Set Up VPC Peering Connections
To connect your application to TiDB Cloud, you need to set up VPC peering with TiDB Cloud. It is one step of Connect to Your TiDB Cluster. This document walks you through setting up VPC peering connections on AWS and on GCP.
VPC peering connection is a networking connection between two VPCs that enables you to route traffic between them using private IP addresses. Instances in either VPC can communicate with each other as if they are within the same network.
Currently, TiDB Cloud only supports VPC peering in the same region for the same project. TiDB clusters of the same project in the same region are created in the same VPC. Therefore, once VPC peering is set up in a region of a project, all the TiDB clusters created in the same region of this project can be connected in your VPC. VPC peering setup differs among cloud providers.
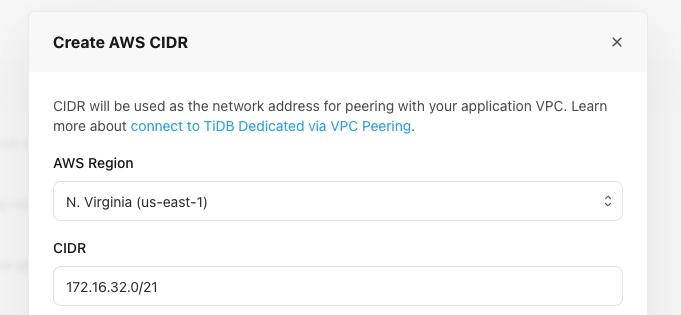
Prerequisite: Set a Project CIDR
Project CIDR (Classless Inter-Domain Routing) is the CIDR block used for network peering in a project.
Before adding VPC Peering requests to a region, you need to set a project CIDR for your project's cloud provider (AWS or GCP) to establish a peering link to your application's VPC.
You can set the project CIDR when creating the first Dedicated Tier of your project. If you want to set the project CIDR before creating the tier, perform the following operations:
On the TiDB Cloud console, choose a target project, and then click the Project Settings tab.
In the left pane, click Project CIDR.
Click Add a project CIDR for AWS or Add a project CIDR for Google Cloud according to your cloud provider, specify one of the following network addresses in the Project CIDR field, and then click Confirm.
- 10.250.0.0/16
- 10.250.0.0/17
- 10.250.128.0/17
- 172.30.0.0/16
- 172.30.0.0/17
- 172.30.128.0/17
View the CIDR of the cloud provider and the specific region.
The region CIDR is inactive by default. To activate the region CIDR, you need to create a cluster in the target region. When the region CIDR is active, you can create VPC Peering for the region.

On AWS
Step 1. Add VPC peering requests
On the TiDB Cloud console, choose a target project for VPC peering, and then click the Project Settings tab.
The VPC Peering configuration is displayed by default.
Click Add, choose the AWS icon, and then fill in the required information of your existing AWS VPC:
- Region
- AWS Account ID
- VPC ID
- VPC CIDR
You can get these information from your VPC details on the VPC dashboard.

Click Initialize. The Approve VPC Peerings dialog is displayed.
Step 2. Approve and configure the VPC peering
Use either of the following two options to approve and configure the VPC peering connection:
Option 1. Use AWS CLI
Install AWS Command Line Interface (AWS CLI).
curl "https://awscli.amazonaws.com/awscli-exe-linux-x86_64.zip" -o "awscliv2.zip"
unzip awscliv2.zip
sudo ./aws/install
Configure AWS CLI according to your account information. To get the information required by AWS CLI, see AWS CLI configuration basics.
aws configureReplace the following variable values with your account information.
# Sets up the related variables.
pcx_tidb_to_app_id="<TiDB peering id>"
app_region="<APP Region>"
app_vpc_id="<Your VPC ID>"
tidbcloud_project_cidr="<TiDB Cloud Project VPC CIDR>"
For example:
# Sets up the related variables
pcx_tidb_to_app_id="pcx-069f41efddcff66c8"
app_region="us-west-2"
app_vpc_id="vpc-0039fb90bb5cf8698"
tidbcloud_project_cidr="10.250.0.0/16"
Run the following commands.
# Accepts the VPC peering connection request.
aws ec2 accept-vpc-peering-connection --vpc-peering-connection-id "$pcx_tidb_to_app_id"
# Creates route table rules. aws ec2 describe-route-tables --region "$app_region" --filters Name=vpc-id,Values="$app_vpc_id" --query 'RouteTables[*].RouteTableId' --output text | tr "\t" "\n" | while read row do app_route_table_id="$row" aws ec2 create-route --route-table-id "$app_route_table_id" --destination-cidr-block "$tidbcloud_project_cidr" --vpc-peering-connection-id "$pcx_tidb_to_app_id" done# Modifies the VPC attribute to enable DNS-hostname and DNS-support. aws ec2 modify-vpc-attribute --vpc-id "$app_vpc_id" --enable-dns-hostnames aws ec2 modify-vpc-attribute --vpc-id "$app_vpc_id" --enable-dns-support
After finishing the configuration, the VPC peering has been created. You can connect to the TiDB cluster to verify the result.
Option 2. Use the AWS dashboard
You can also use the AWS dashboard to configure the VPC peering connection.
Confirm to accept the peer connection request in your AWS console.
Sign in to the AWS console and click Services on the top menu bar. Enter
VPCin the search box and go to the VPC service page.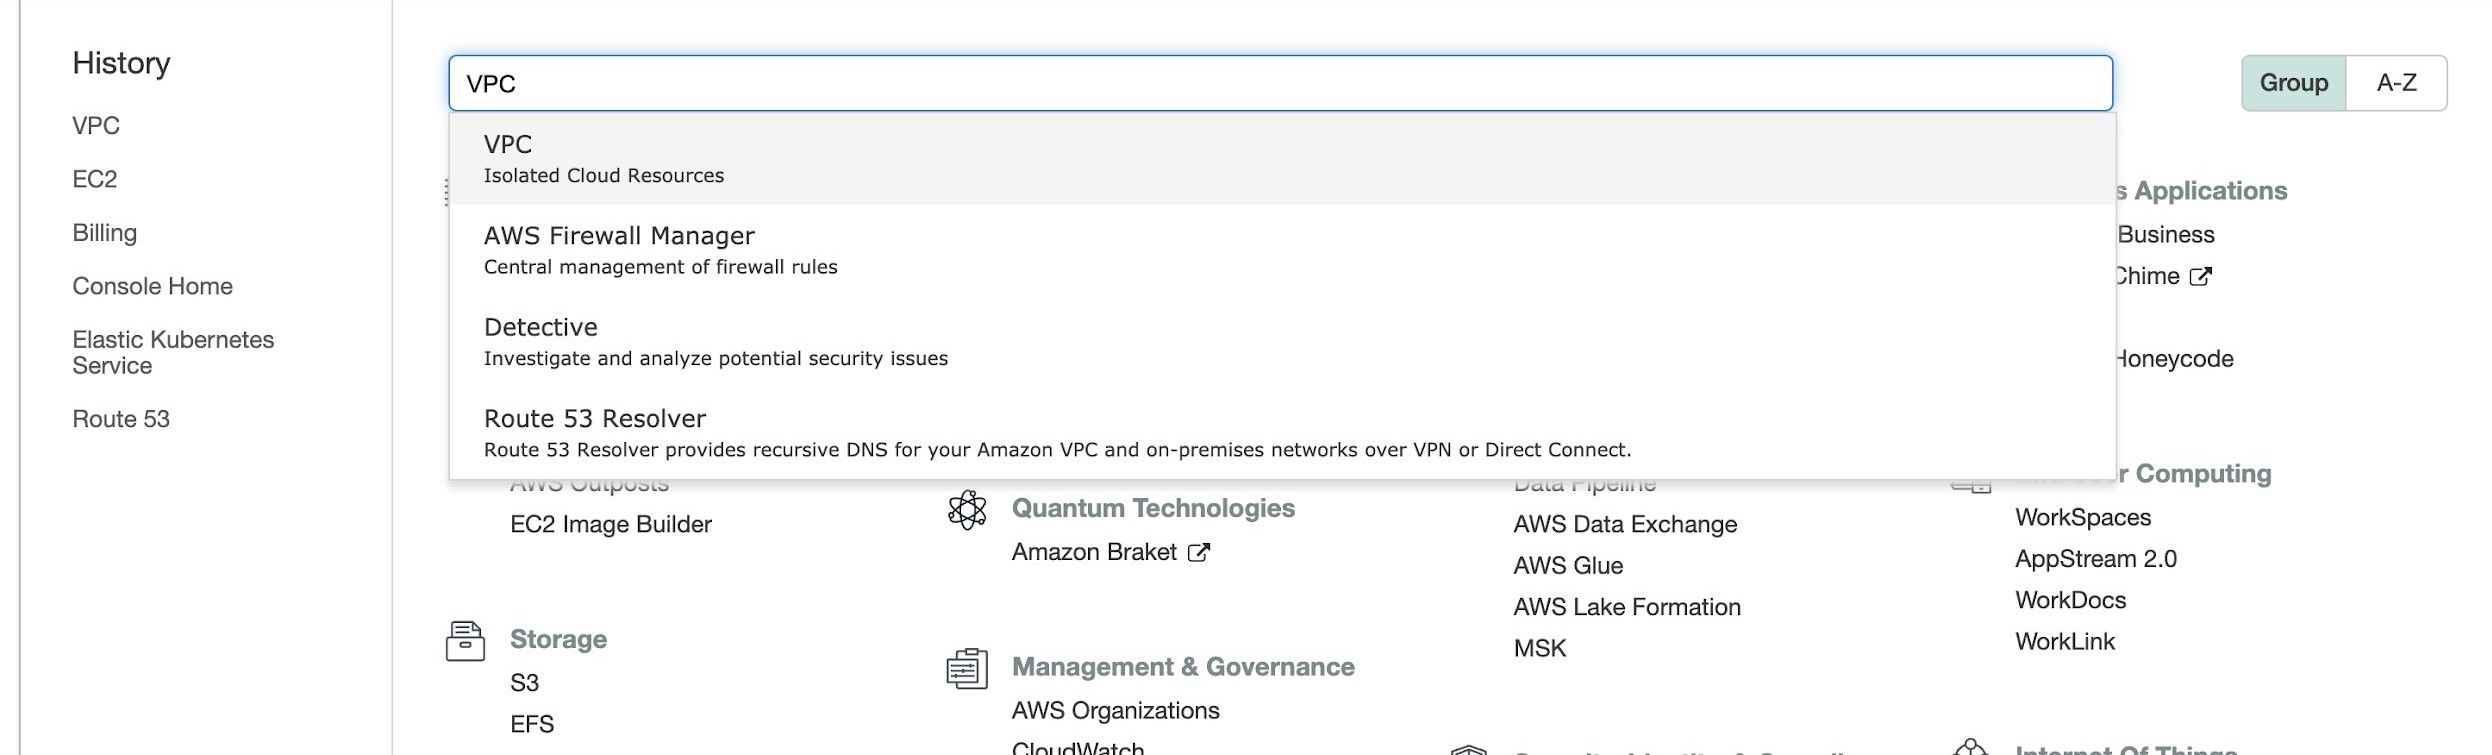
From the left navigation bar, open the Peering Connections page. On the Create Peering Connection tab, a peering connection is in the Pending Acceptance status.
Confirm the requester owner is TiDB Cloud (
380838443567). Right-click the peering connection and select Accept Request to accept the request in the Accept VPC peering connection request dialog.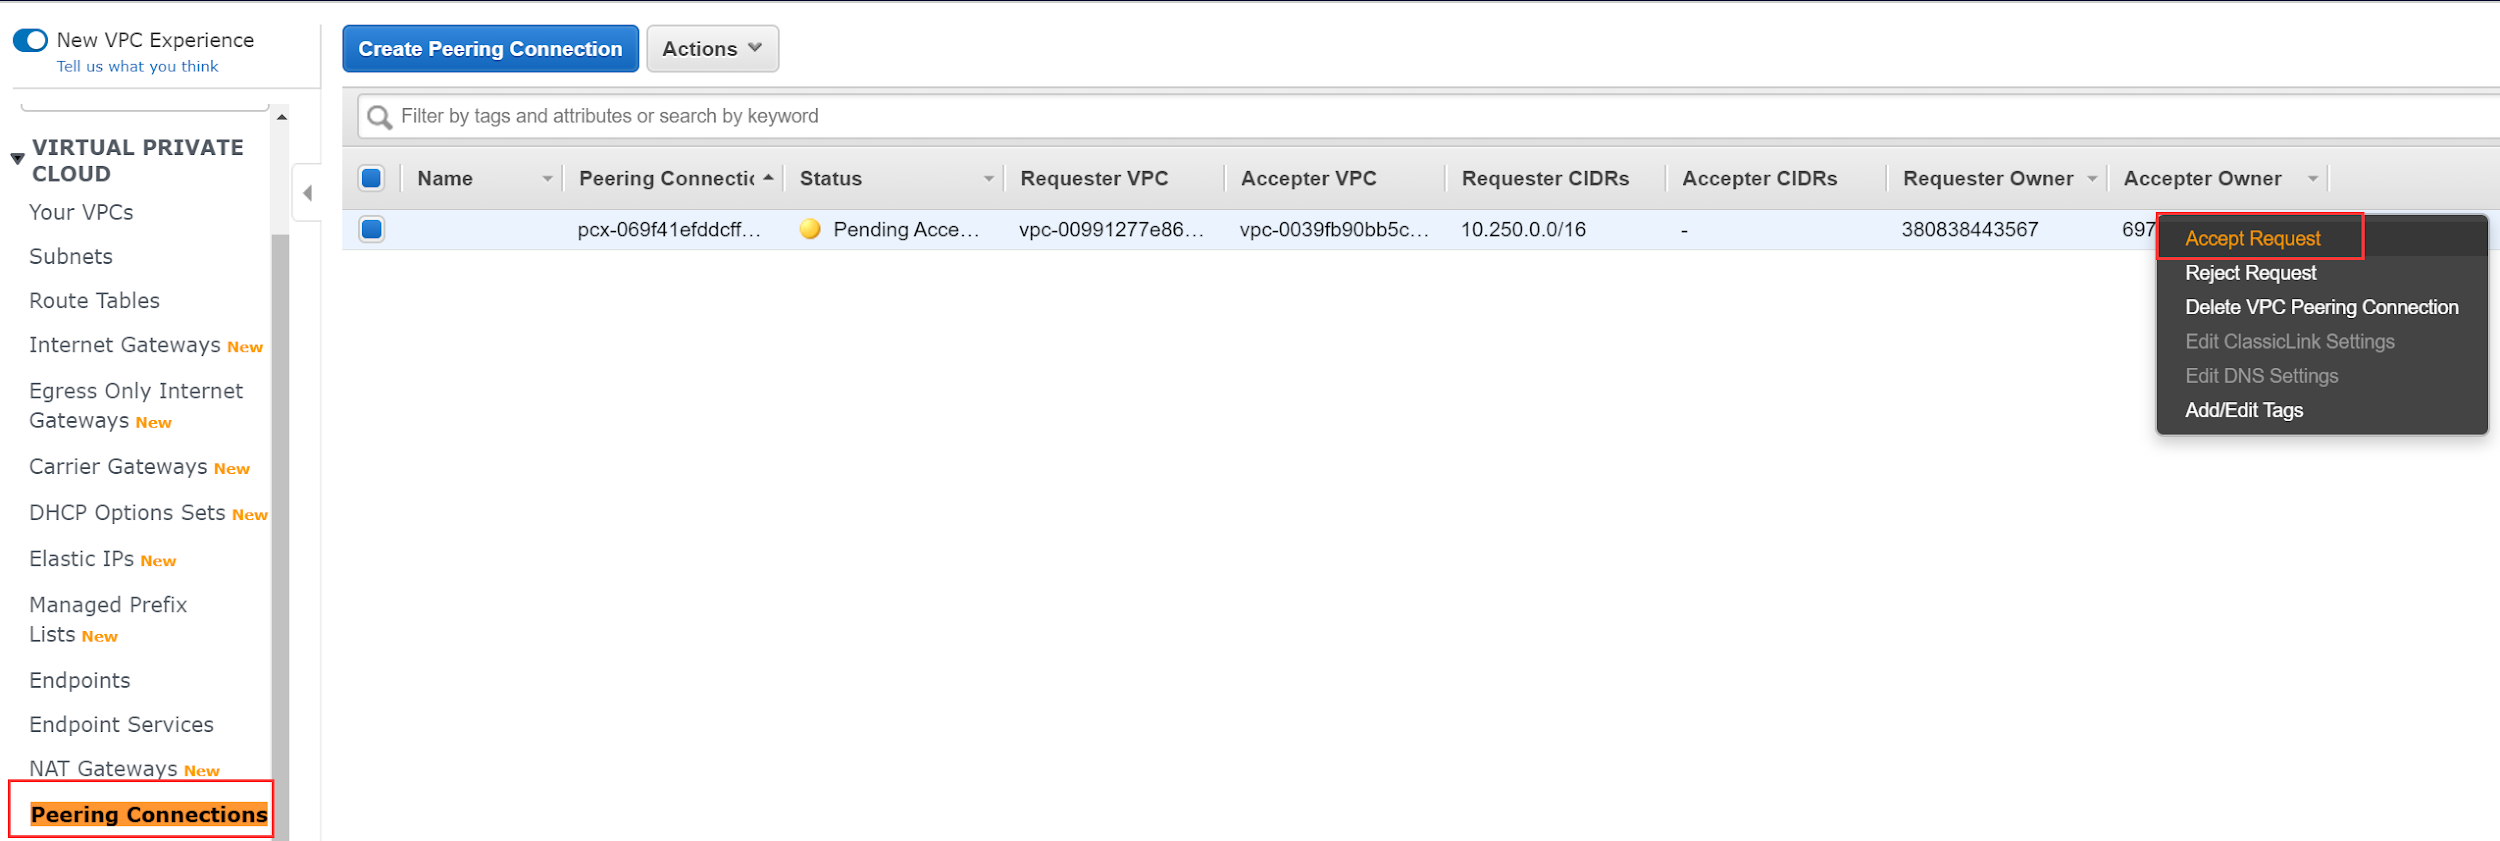
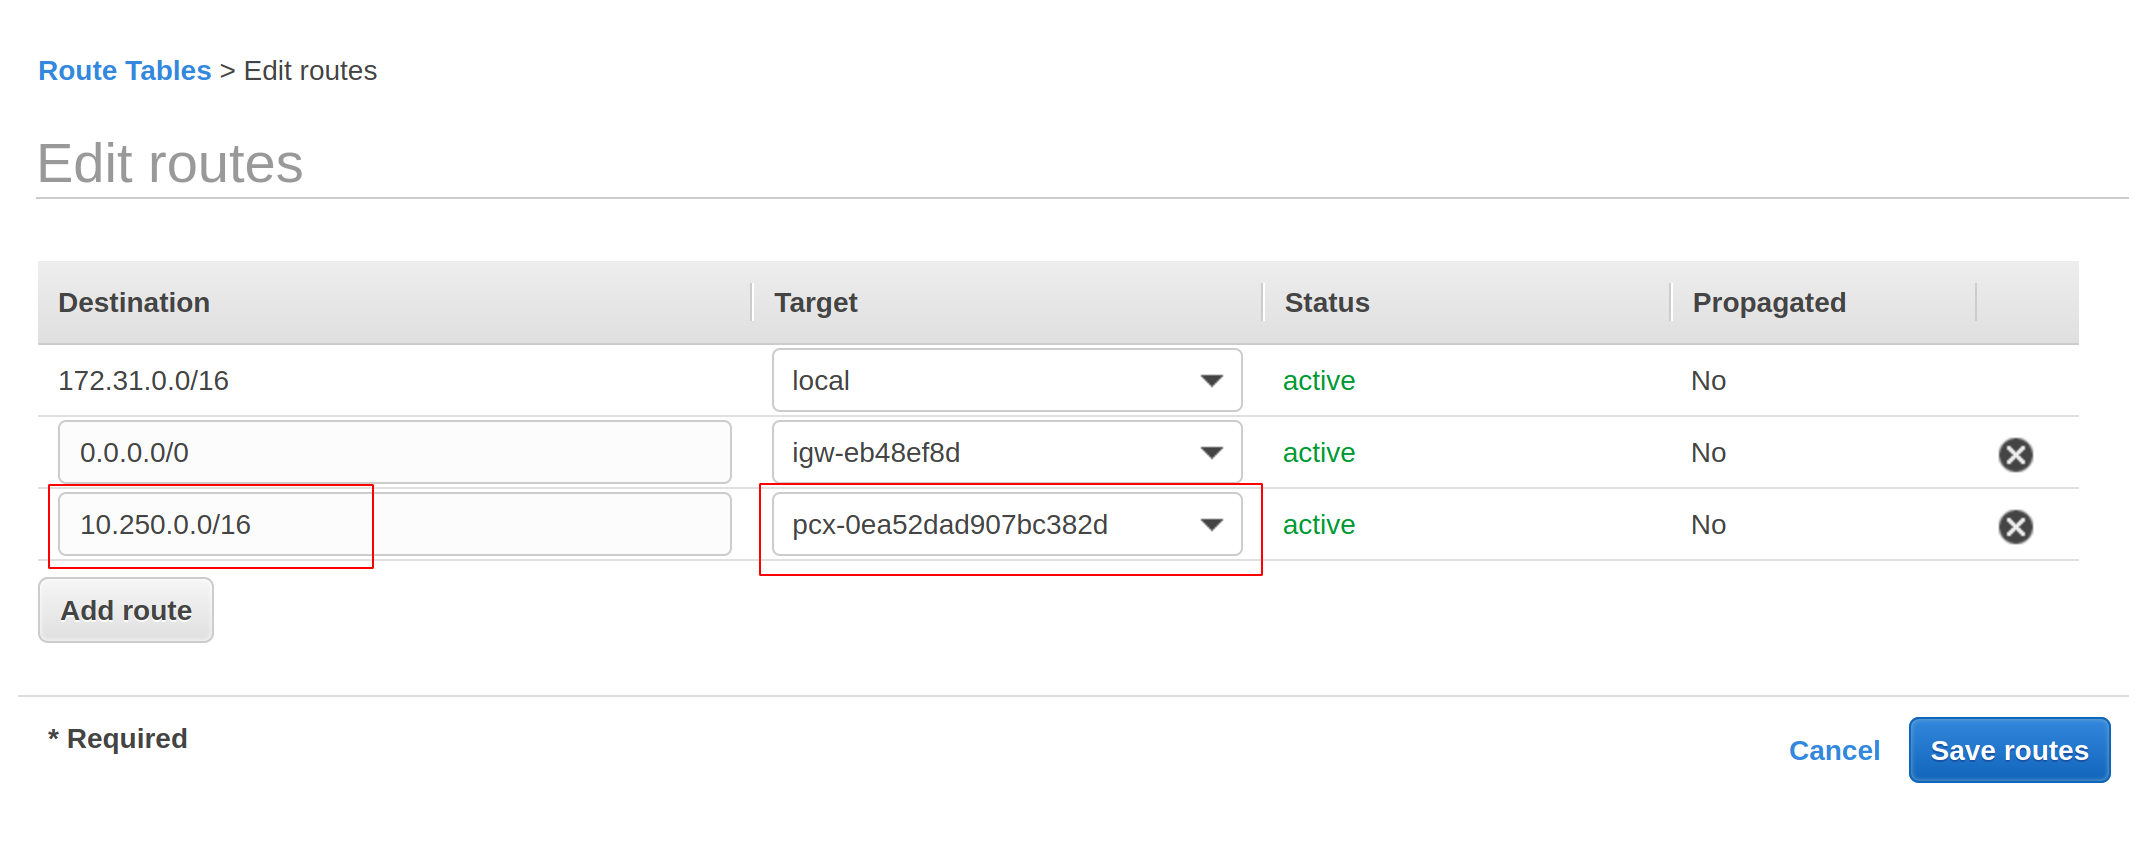
Add a route to the TiDB Cloud VPC for each of your VPC subnet route tables.
From the left navigation bar, open the Route Tables page.
Search all the route tables that belong to your application VPC.
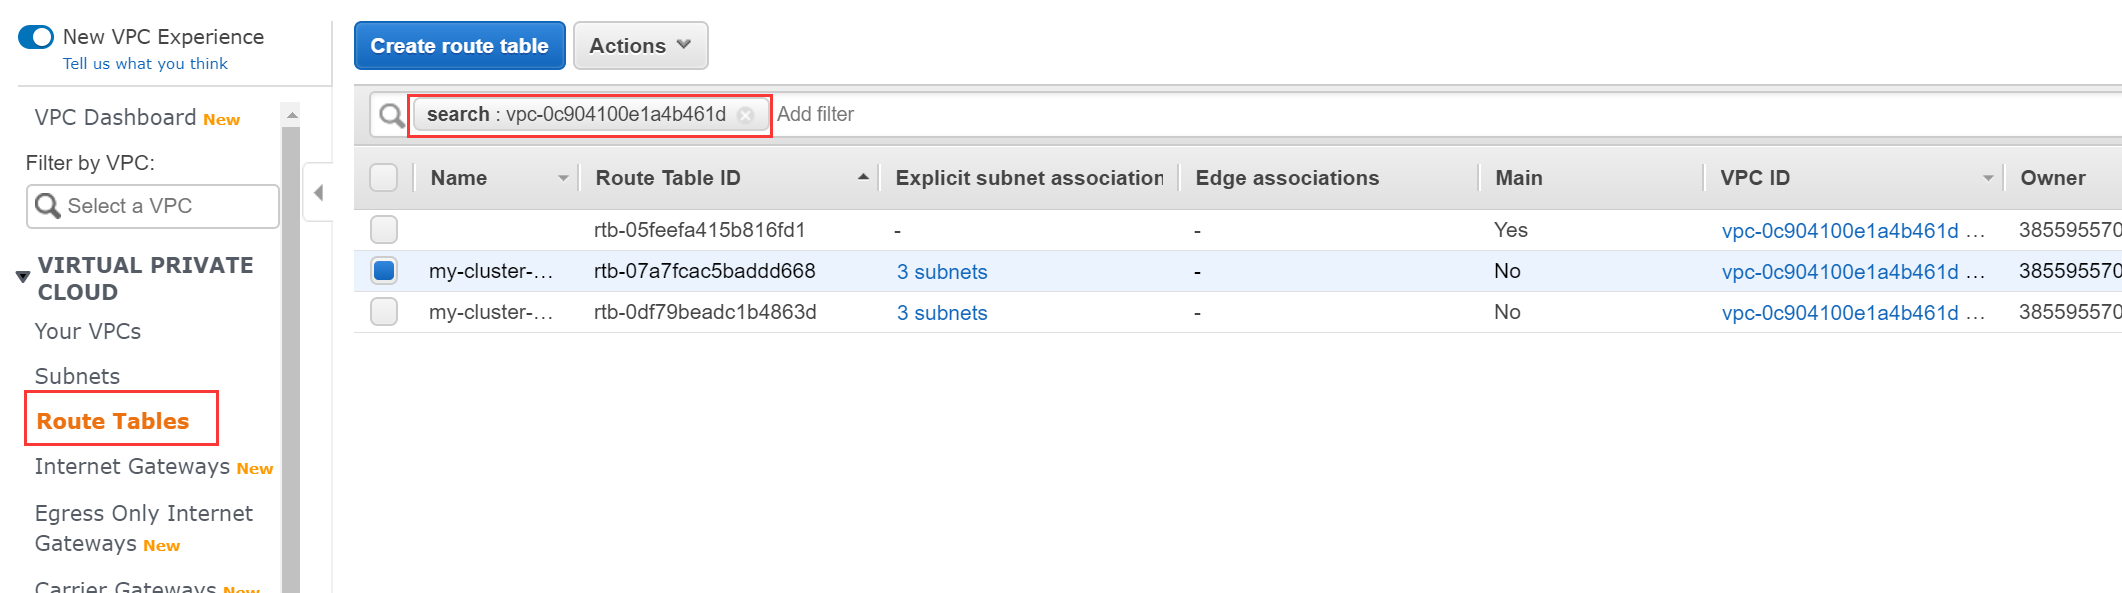
Right-click each route table and select Edit routes. On the edit page, add a route with a destination to the Project CIDR (by checking the VPC Peering configuration page in the TiDB Cloud console) and fill in your peering connection ID in the Target column.
Make sure you have enabled private DNS hosted zone support for your VPC.
From the left navigation bar, open the Your VPCs page.
Select your application VPC.
Right click on the selected VPC. The setting drop-down list displays.
From the setting drop-down list, click Edit DNS hostnames. Enable DNS hostnames and click Save.
From the setting drop-down list, click Edit DNS resolution. Enable DNS resolution and click Save.
Step 3. Connect to the TiDB cluster on TiDB Cloud
- Navigate to the Clusters page.
- Locate the target cluster, and click Connect in the upper-right corner of the cluster area. The connection dialog is displayed. You can see the Status of the VPC peering is active. If Status is still system checking, wait for about 5 minutes and open the dialog again.
- Access the TiDB Cluster from the instance within the VPC. See Connect to Your TiDB Cluster.
On GCP
Steps
On the TiDB Cloud console, choose a target project for VPC peering, and then click the Project Settings tab.
The VPC Peering configuration is displayed by default.
Click Add, choose the Google Cloud icon, and then fill in the required information of your existing GCP VPC:
- Region
- Application GCP project ID
- VPC Network Name
- VPC CIDR
Click Initialize. The Approve VPC Peerings dialog is displayed.
Check the connection information of your TiDB VPC peerings.

Execute the following command to finish the setup of VPC peerings:
gcloud beta compute networks peerings create <your-peer-name> --project <your-project-id> --network <your-vpc-network-name> --peer-project <tidb-project-id> --peer-network <tidb-vpc-network-name>